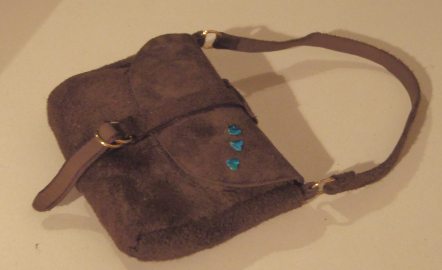
so I decided to make a bag or two for Lorie.
I started with drawing a idea of how I would make my first bag,
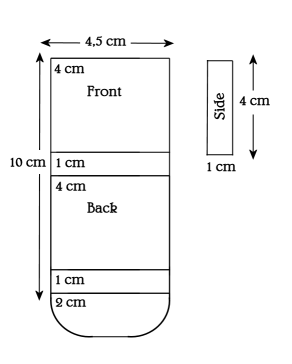
Here is the pattern I made first:
Cut a piece of the bag and two side pieces,
2 long narrow strips that are longer than the bag piece,
and 2 short narrow strips.
Click here for the pattern in a PDF file
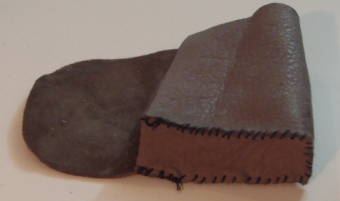
Since I liked the wrong side of this leather
- I think it looks like suede -
I chose the reverse side, as the nice side.
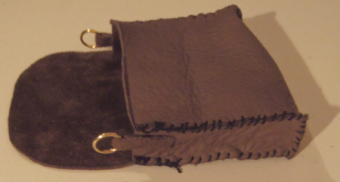
fold them in half, put a small jump ring in,
I have used a glue gun to glue the leather around the ring.
See the picture.
Glue these two pieces to the top of each side piece on the inside.
Take one of the long narrow strips, and make a small bend on each end of it,
set a bend in each jump ring and glue together for the shoulder strap.
Now do turn the bag, so the nice part is out.
The last long narrow strip, is used for closing of the bag.
At one end made a small fold, set of two small jump rings into the fold - glue


I did cut out, 3 more small pieces of leather,
to put this long strip unti the bag.
the two jump rings should sit on the flap.
I have used the glue gun to put
the 3 small holder pieces on the bag.
To close the bag
pull the end of the strip, first through both rings,
and then back through the bottom ring.
See the picture at the top.
Now you may decorate your bag or leave it as is.
If you have a Silhouette Portrait or a Camero, you can find the pattern fir your printpogram here: Patterns for Tangkou
Happy crafting